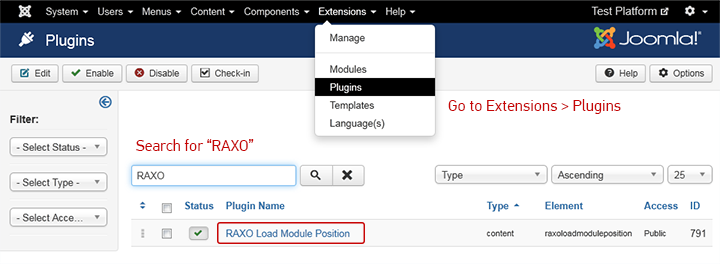
Step 1: Access the Plugin Manager panel
In Joomla administration panel of your site go to: Extensions > Plugins.
Search for "RAXO" in plugin manager to quickly locate the installed plugin.

Step 2: Enable and configure RAXO Inser Position plugin
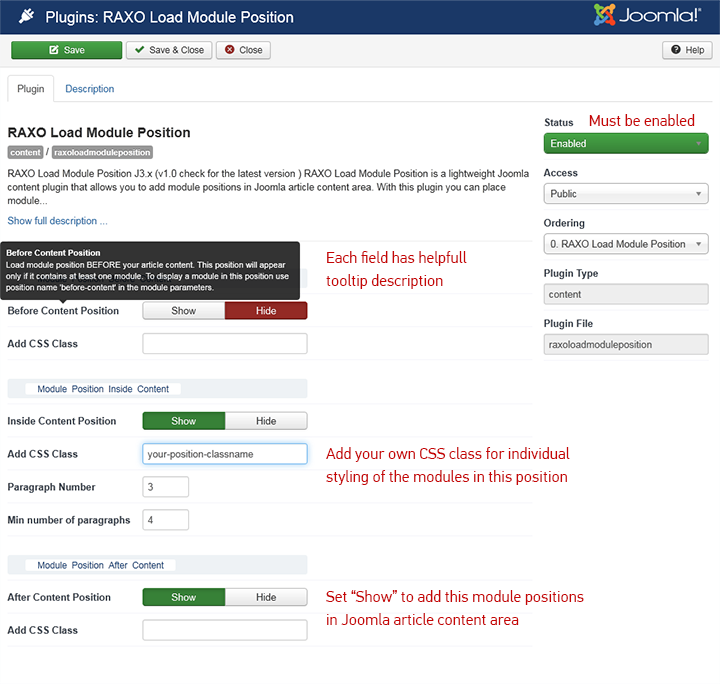
RAXO Load Module Position is a lightweight Joomla content plugin that automatically adds module positions into Joomla articles. With this plugin you can place up to three module positions: before and after article content, and inside article content. Then you can place any Joomla module inside these module positions.

1. Make sure to enable the plugin.
2. To add a module position you just need to click "Show" button.
You can display one or up to three module positions. No worries, they will not be visible on your site immediately. These smart positions will appear only after you place a module inside.
3. For design and development purposes, each module position has a predefined CSS class:
raxo-before-content
raxo-inside-content
raxo-after-content
Also, you can use field "Add CSS Class" to assign your own CSS class to a position created by the plugin.
Note: All plugin parameters have helpful tooltip descriptions. Just put cursor on any parameter name and the description will appear.
Step 3: Place any module inside the created positions
The last step is to place a module you want inside these newly created positions.
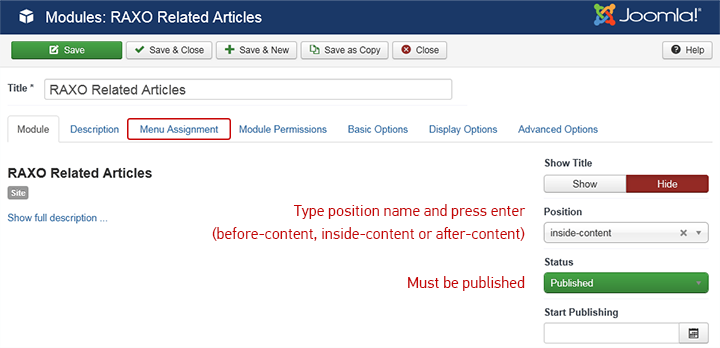
Go to Extensions > Modules > Module settings

1. In Position field type (not select) the position name and press enter.
There are three position names:
before-content
inside-content
after-content
2. Go to Menu Assignment settings of the module and select on which pages the module should appear.
3. Make sure the module is published.
